Master Bear Drawing: A Step by Step Guide
Delving into the magnificent realm of wildlife artistry, one encounters the captivating allure of capturing a sleeping bear in a sketch. A subject offering myriad artistic opportunities – from rendering the tactile quality of fur to portraying the gentle tranquility of a sleeping creature. To depict such a scene with precision and artistry, two aspects characterise the essential paving stones on this artistic journey. First, is acquiring a profound understanding of bear anatomy – a meticulous study of their physical attributes that sets the foundation for a realistic sketch. Second, mastering the versatile tool of pencil sketching techniques opens up a world of possibilities to breathe life into your drawing. Furthermore, these techniques will enable the artist to render the intricate subtleties and diverse textures of a sleeping bear, thereby adding dynamism to the sketch.
Understanding Bear Anatomy
Unveiling the Artistry of the Ursine Figure: A Guide to Drawing Bears
Often dubbed as nature’s great sleepers and honey aficionados, bears are extraordinary creatures that capture the imagination of many. Their distinctive bodily characteristics and intriguing behaviour patterns make them a fascinating subject in the creative realm. Yet, replicating their superb anatomy through art can be quite the challenge. Wondering how to tackle this? Delve into this artist’s guide on the key features of a bear’s anatomy for drawing.
Understanding Bear Anatomy: A General Overview
Start from the very basics of understanding a bear’s anatomy. This majestic creature explores the wild on all fours, with their bodies lengthened in a horizontal movement that often camouflages their real height. Notice the circular head with small eyes, the bulky and robust body enveloped in luxuriant shaggy fur and the robust, muscular limbs defining their powerful stance. The more one understands these nuances, the easier it becomes to replicate these features in one’s drawings.
Sketching the Bear: A Step-by-step Guide
-
The Circular Head
-
The Robust Body
-
The Powerful Limbs
-
Majestic Fur
-
The Tail
The quintessential bear begins with a neat, circular head, to which, everything else essentially connects. Unlike many animals, the bear’s forehead seamlessly flows into the snout without a prominent break. This creates an illusion of the eyes and nose being situated quite close to each other. Ears are usually rounded and situated on both sides of the head, in line with their eyes.
Just think of a bulging rectangle or a large loaf of bread, that’s the bear’s robust body for you. It’s no secret that bears have a baton for storing fat, so don’t hesitate to be generous with the sketching of their bodies. With this, make sure to note the sluggish slump between the hips and shoulders, a unique feature that gives them their characteristic hunched back.
Bears’ limbs are thick, sturdy and muscular. When it comes to the forelimbs, they are slightly shorter compared to the hind limbs. Bears employ their low-lying, robust paws to paw for food and even swat in defence. Ever notice their peculiar waddle while walking? That’s because the entire sole of their foot touches the ground, much like humans. This walking style is called ‘plantigrade’ and quite uncommon in the animal kingdom. When illustrating, make sure to depict these sturdy legs ending in broad paws, completed with sharp, non-retractile claws.
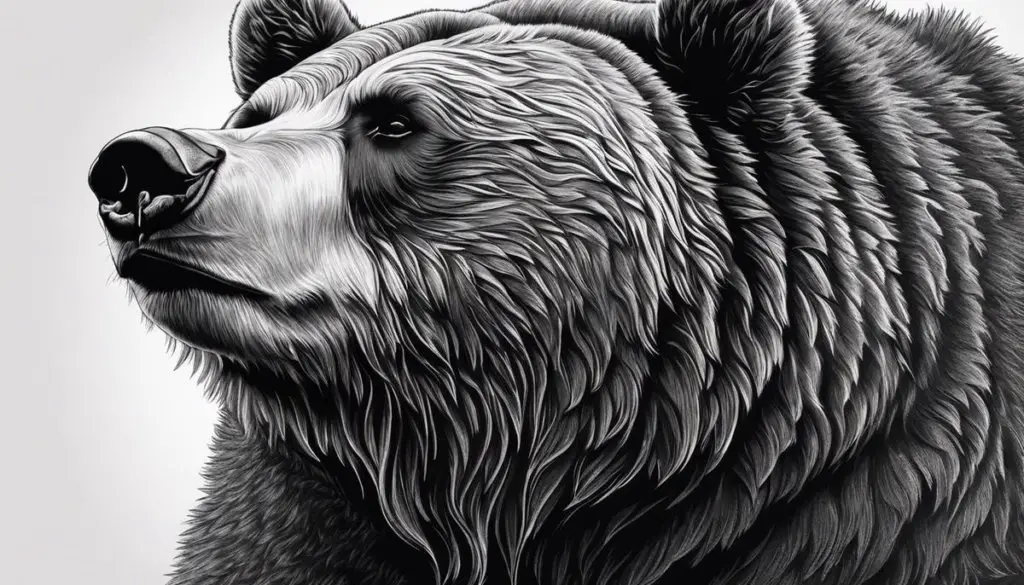
Respect the bear’s ornament of fur – dense and floppy. When drawing fur, the trick lies in not attempting to sketch every strand. Instead, focus on understanding the direction, texture, length, and colour of the bear’s coat. Your fur illustration should communicate the bear’s fluffy corpulence and the masked patterns in their fur colour which aids their camouflage.
Lest we forget, bears do have tails! Albeit short and mostly hidden amidst their plush fur, petite, stubby tails are a part of their anatomy. Don’t forget to sketch this minute, yet significant detail.
Drawing a bear is no simple task. The ability to capture their mighty presence amidst the wilderness speaks volumes about an artist’s understanding of the anatomy of these magnificent beasts. So keep practising, and every new rendition will inch you closer to the perfect bear anatomy, landing you in the good “bearings” of this noble creature. So, the world of bear-drawing awaits you, loaded with excitement and new learnings with every stroke of your pencil. Carry on, creative soul. The wilderness awaits your artistic interpretation.

Pencil Sketching Techniques
Enriching Animal Portraits with Innovative Pencil Sketching Techniques
Just as each creature in the wild possesses a unique persona, translating that essence into art involves more than mere imitations. Sketching animals with pencil allows for an inherent versatility and provides room for artistic interpretation. And as we have explored the process of drawing a bear, let’s build upon that foundation and delve into some techniques that could enhance any animal rendition.
Experimenting with Different Pencil Grades
Selecting the appropriate pencil grade can make a noticeable difference when portraying an animal’s distinctive features. For example, a lighter pencil like a 2H can deftly capture the finer textures, such as the softness of a rabbit’s coat or the silkiness of a cat’s whiskers. Conversely, darker pencils such as a 4B or 6B can emphasise robust features like the muscular build of a horse or the dense mane of a lion.
Mastering Shading and Blending Techniques
Shadows and lights are not merely contrasts but also essential components for achieving depth and shaping form. When depicting animals, gradients play a crucial role in giving an impression of their complex muscular structures or feather arrangements. There are numerous blending techniques to consider, from using the side of your pencil for spreading shadows, your fingertips for subtle smudges, or dedicated stumps and tortillons for precise blending effects.
Employing Line Work and Cross-Hatching
Line work and cross-hatching can be critical in conveying an animal’s distinctive textures or patterns. The markings on a zebra, the scales of a fish, or the spots on a leopard can all be skillfully represented through selective line work. Employing different weights of lines can give the impression of depth, while cross-hatching can easily simulate the denseness or matte of fur or feathers.
Incorporating the Background
No creature exists in isolation. Therefore, incorporating elements of the background is essential in imparting a sense of environment to the subject. Whether it’s a hint of jungle foliage behind a tiger, a shimmering pond for a graceful swan, or the sandy plains for a herd of grazing antelope, hints of environmental factors can add depth and authenticity to the animal’s portrayal.
Capturing Emotion through Eyes
Eyes are said to be the windows to the soul; this rings true even in the animal kingdom. Transmitting emotion through the eyes breathes life into the sketch, turning a flat representation into a living, breathing creature. Consider sketching a glint in the eyes to imbue life, or portraying a downward gaze for an introspective mood.
By incorporating these techniques, animal sketching becomes more than a simple depiction of their anatomical accuracy – it transforms into an expressive portrait brimming with life. Each pencil stroke contributes to a vivid illusion of fur, feathers, scales or hide; blending, shaping, and shading that teeter on the edge of reality. Imagine the immense satisfaction in watching a flat piece of paper evolve into an awe-inspiring scene from the wild! So grab those pencils, let creativity flow, and bring the wild into the world of art.
Adding Details and Final Touches
Adding Detailed Features and Final Touches to Your Bear Drawing
Having mastered the initial sketch of your bear and experimented with shading and line work techniques, it’s time to add the finer details and final touches that transform preliminary sketches into fully-fledged artworks. This process encompasses the bear’s diverse range of textures, its eye-catching features and the element of the surrounding scenery.
Texturing & Detailing the Fur
Perhaps the most defining feature of a bear’s appearance is its plush, luxurious fur. Switch to a higher grade pencil, such as HB or even a mechanical pencil, to illustrate individual strands of fur. Lightly follow the direction of the fur’s growth, taking care to create irregular lengths and wave patterns for a natural appearance. This approach enhances the realistic appearance of your bear against the likeness of its inherent spirit.
The Whiskers & Claws
Often overlooked, the whiskers and claws of a bear are paramount to achieving an accurate drawing. Delineate the whisker dots with a sharp 2H pencil, lightly sketching them around the snout area. Use a darker grade pencil for the actual whiskers, taking care to avoid uniform strokes. As for claws, they should be thick and curved. Using a 2B pencil, outline them first before shading. Remember, they aren’t always visible, depending on the bear’s position.
The Bear’s Features: Eyes, Teeth, and Nose
If the eyes are the windows to the soul, the detailed rendering of a bear’s eyes can evoke various emotional responses from the viewer. For a lifelike depiction, strike a balance between the whites (using your eraser) and the dark of the pupil (a sharp B pencil).
Teeth, often exposed in an open-mouthed drawing, demand a careful handling to avoid a jarring or cartoonish effect. Use your 2H pencil for light shading, which can be effectively contrasted by the darkness of the open mouth.
The bear’s nose, akin to leather in texture, can be incorporated with soft shading of a B or 2B pencil, smeared lightly with a blending stump for a smooth finish.
The Environment Touches
The bear’s environment grounds the animal in its natural habitat. To imply grass, use light flicks of an H or 2H pencil in a growing upward motion. Heavier foliage or layers of snow can be handled with 2B or 3B pencils and a blending stump for a softer appearance.
Effective detailing and finishing touches lay the foundation for the awe-inspiring illustrative journey, turning a sketch into a lively bear that leaps from the paper. Much like each creative endeavour itself, these steps invite the unlimited potential for artistic exploration and innovation.

Once you have your bear sketch in place, it becomes a playground to explore and enhance. The art of adding intricate details and final touches is akin to putting the cherry on top of a well-baked cake – it enhances the overall outcome and makes the drawing more convincing. Adding layers of texture, detailing the fur strands, and incorporating the peaceful demeanour of a sleeping bear, all come together to create a harmonious and appealing piece of art. Moreover, the ability to improve the overall look of the sketch using these techniques can be truly rewarding and lead to a phenomenal increase in the artistic rendition of a sleeping bear. Thus, the journey from understanding anatomy to applying final touches unfolds a fascinating deep-dive into the world of bear drawing – a process both satisfying and educationally enriching.
Recommend0 recommendationsPublished in How To